A short article on a little hobby code project resulting in two watch faces.
As long term fan of the best wearable, The Pebble Watch, my wife and I have a real soft spot for the long battery life epaper watch focused on time keeping and bits of useful functionality. The wearable market is dominated by wellness, fitness and subscription based services. The lack of a true pebble successor is a sad spot. Though in the run up to Christmass we became aware of the Watchy project by SQFMI. https://watchy.sqfmi.com/
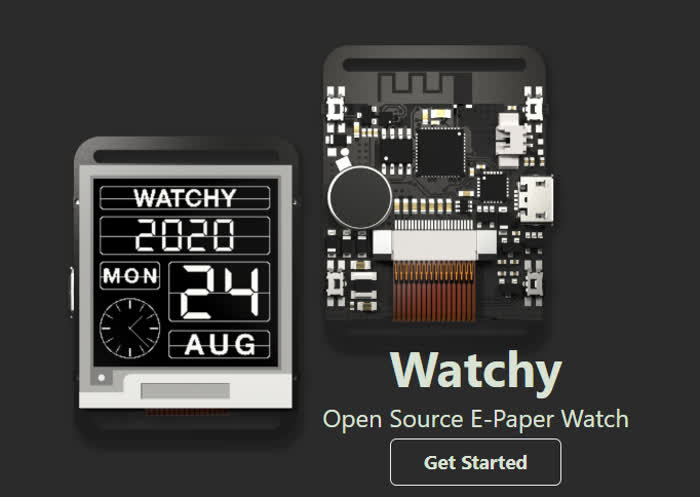
This open source project based on ESP-32 was on its third revision and had a strong basis of functionality that ticked all our boxes:
- E-ink screen
- Long battery Life
- Programmable (preferably with C)
- Physical Buttons
- Wifi and Bluetooth
Building our Watches
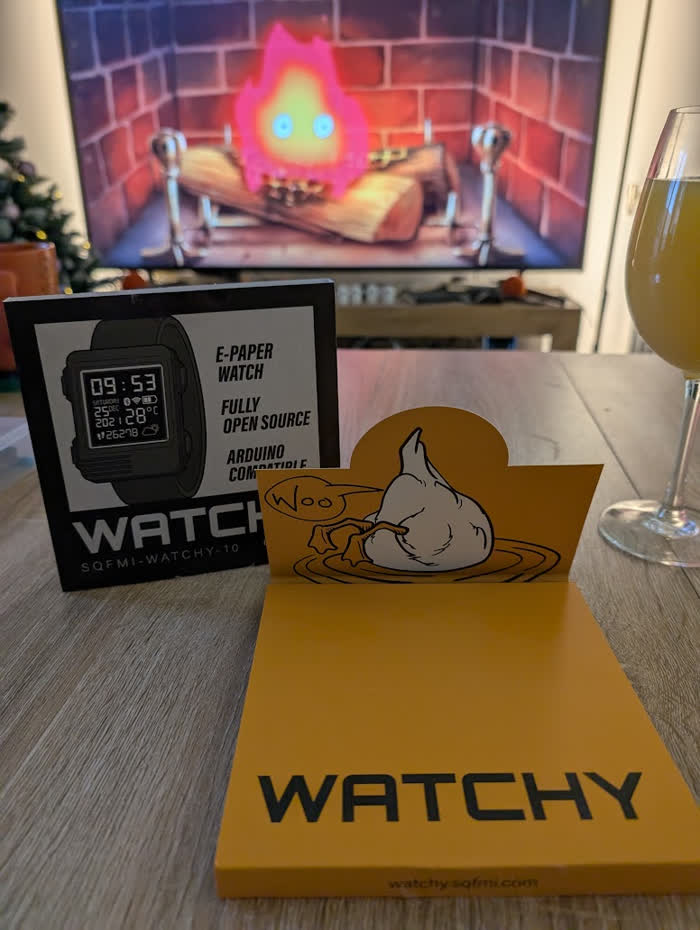
The watches arrived in these lovely packages.
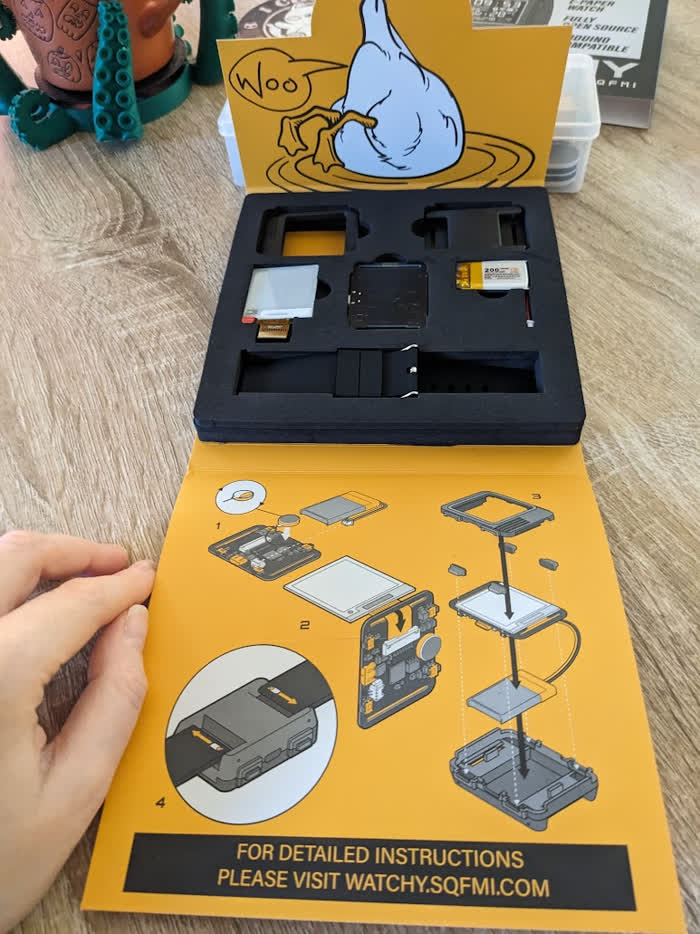
The assembly was relatively simple but quite fiddly with the ribbon cable and the button insets in the case being very fiddly to get in place. Though it is easy enough to do and my wife needed minimal assistance to build her own. I would encourage anyone to try it.
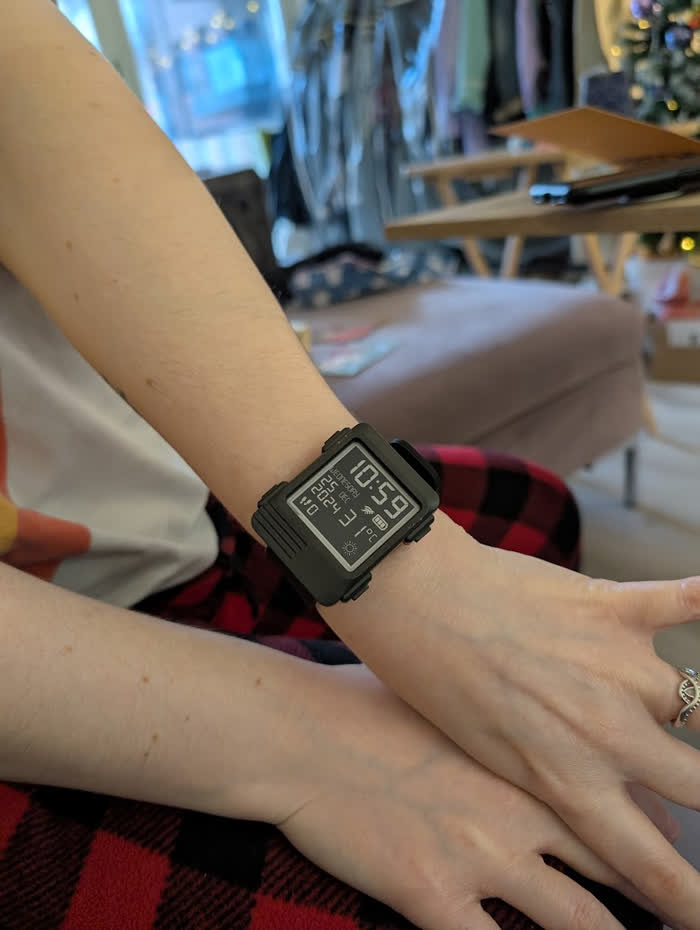
So after an hour on building we ended up with a very nice functional watch.
Open up the Code
But of course the real appeal was the open source and easy to modify watch code. The watch is based on ESP32 and before this I have not touched any ESP32 devices. I have done some embedded programming back in the day but not in a while. However the official firmware, https://github.com/sqfmi/Watchy/, had some real issues including a tendency to overflash the ink screen, cycling the entire screen in an unpleasant way.
The firmware is relatively easy to dig into with the Arduino IDE but the holding buttons to put stuff into Bootloader mode, installing USB drivers and then fighting with various serial comms issues was a real blocker to start. That was until I found some decent ESP32 command line tools. Though it was at this point in doing some investigation I found that the official firmware isn't as well maintained as one would like and you now have two main projects which have their own firmware to explore.
Ink Watchy
The first one I played with was Ink Watchy, https://github.com/Szybet/InkWatchy/
It looks very feature rich and has some great stuff in it. Though looking at the build instructions the disdain for anyone not on linux was painful. That coupled with an insistence on Docker and a cryptocoin positive outlook set off all kinds of red flags.
The toolkit and build system used was PlatformIO. The KEY feature of this being Use whenever, Run everywhere. The SCONS based system, the same used by Godot, is python first and very cross platform. Rather than doing the simple stuff in python scripts in platform agnostic ways it builds using a bunch of bash scripts and the build tooling for InkWatchy is a pain in the neck. I dug through it for a while converting logic to Python and fixing platform specific issues but honestly after most of a wasted day I was fuck it this sucks.
Though thankfully this did teach me PlatformIO which is a great toolset for this problem space. This led me to the alternative firmware.
WatchyGSR
The WatchyGSR project is a bit less along but much more stable. https://github.com/GuruSR/Watchy_GSR/
It didn't have a bitcoin feature set up front, it has a decent configurable demo binary. This combined with the platformIO cli tools made building a lot easier. The addon / watch face override system is simple to grasp and easy to deploy. The best part is an OTA (over the air) update system which lets you configure the watch from your browser and even drop most, not all, updates as a firmware update through the browser.
Building and Deploying a new Watchface
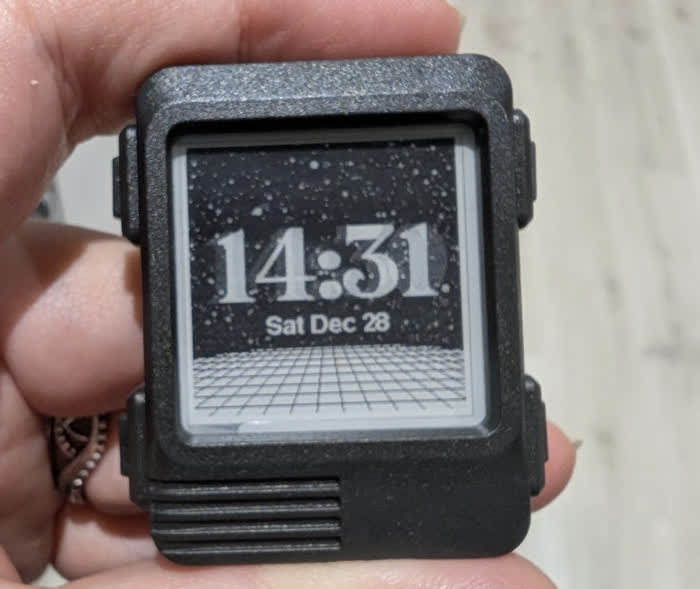
The first step was looking at the code base and seeing there was included, but not enabled by default, examples of porting the additional watch faces from the official repo in the code base. This meant I was able to get the Starry Horizon watch face on and that immediately made both me and my wife happy as the Cyberpunk+Space watchface looked very cool.
Now to get my hands dirty what was the simplest thing I could do to take the watchface from the basic to a new cool addition. So first off I copied the watchface class, as the system is based on overriding the WatchyGSR class. The key virtual functions being InsertDrawWatchStyle and handleButtonPress.
There was an excessive use of write commits in the code which I cleaned up to better batch draw calls. I played with how the sky and grid was drawn. Optimising a few of the draw calls to better batch. Also things like the ground never changes with time, while the stars do rotate on the minute. So I did some optimisation.
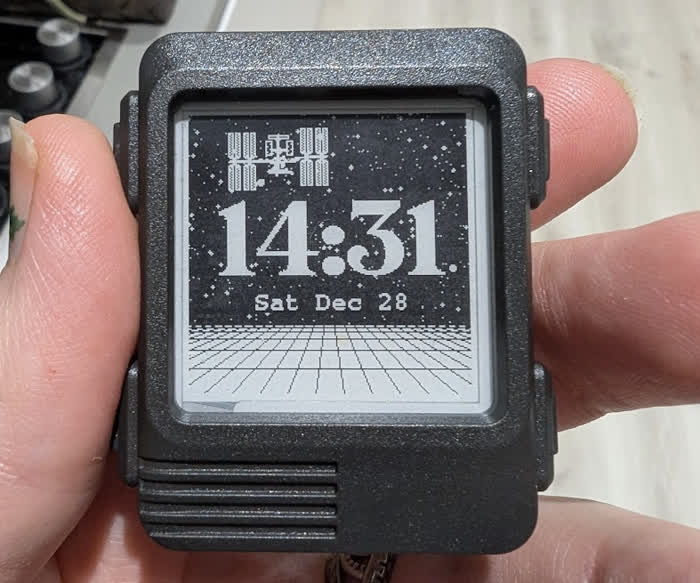
Feeling better I needed a goal: Let's put the ISS into orbit.
Drawing BITmaps
Images on embedded devices, even fonts, tend to be PROGMEM code embedded systems. You convert images to C style arrays and bit pack down and then draw using bit shift logic. Though again looking at the main utility function it seemed a bit wasteful so I made my own one bit bitmap drawing function.
void drawBitmap1Bit(int16_t sx, int16_t sy, const uint8_t bitmap[], int16_t w, int16_t h, uint16_t color)
{
    int16_t offset = 0;
    uint8_t b = bitmap[offset];
    uint8_t bw = 0;

    display.startWrite();
    for (int16_t y = sy; y < (sy+h); y++) {
        for (int16_t x = sx; x < (sx+w); x++) {
            if(b & 0x80) {
                display.writePixel(x, y, color);
            }

            b <<= 1;
            bw++;
            if(bw == 8) {
                offset++;
                bw = 0;
                b = bitmap[offset];
            }
        }
    }
    display.endWrite();
}
You will notice that it will ONLY write when the bit is enabled and will either write white or black. This is batched in a single write operation. The important thing to note is that this is a Big Endian solution so that is simple to encode. I needed a method to convert images to code and for that I was using https://notisrac.github.io/FileToCArray/
Now after grabbing MsPaint and a basic silhouette of the ISS I did some by hand pixelling to make an ISS. I then had a bunch of encoding issues as the website I linked above did a pretty poor job of per line encoding with fixed endian (despite the toggle). Though I was able to get it to do what I want and BOOM I had an orbiting ISS. My wife was super happy.
Fresh Watch Face
So while this was going on we had shoved on a monster movie marathon from the classic MST3K. The brilliance of this old show being a staple in the house, I decided that I should make a MST3K watch face as my first from scratch watch face.
So copying over the watch face I had been editing I stripped it down and got the date and time printing. Though the image pipeline was a real PITA. So I decided to switch to a proper tool. So I loaded up Aesprite, which I had not used in a long time. It is a great piece of pixelling software but has no export to C array function I could find.
So while I could make great art in this software I needed to make a better export option. So looking at the LUA scripting interface I found this GameBoy export script. https://github.com/boombuler/aseprite-gbexport
Using that as a basis I started writing an export to make a simple text file which outputted space for transparent, then 1, 2 for black or white pixels. This 2bit image format lets me make transparent images which can contain both white and black. It took me a while to find the script debugger which was a blind spot in my part. Also the alert dialog doesn't support new line characters so I had to do some error stacktrace printing. Though it was relatively painless to get it exporting the selected area. Getting images like this:
#define TOM_HEIGHT 41
#define TOM_WIDTH 29

// array size is 298
static const byte TOM[] PROGMEM = {
0x00, 0x00, 0x00, 0x00, 0x00, 0x00, 0x00, 0x00, 0x00, 0x0A, 0xAA, 0xA8, 0x00, 0x00, 0x00, 0x00,
0x02, 0xAA, 0xAA, 0x00, 0x00, 0x00, 0x00, 0x00, 0xAA, 0xAA, 0x80, 0x00, 0x00, 0x00, 0x00, 0x22,
0x22, 0x20, 0x00, 0x00, 0x00, 0x00, 0x22, 0x22, 0x22, 0x00, 0x00, 0x00, 0x00, 0x22, 0x22, 0x22,
0x20, 0x00, 0x00, 0x00, 0x0A, 0x22, 0x22, 0x28, 0x00, 0x00, 0x00, 0x02, 0x22, 0x22, 0x22, 0x00,
0x00, 0x00, 0x00, 0xA2, 0x22, 0x22, 0x80, 0x00, 0x00, 0x00, 0x22, 0x22, 0x22, 0x20, 0x00, 0x00,
0x00, 0x02, 0x22, 0x22, 0x20, 0x00, 0x00, 0x00, 0x00, 0x22, 0x22, 0x20, 0x00, 0x00, 0x00, 0x00,
0x02, 0x22, 0x20, 0x00, 0x00, 0x00, 0x00, 0x00, 0xAA, 0xA8, 0x00, 0x00, 0x00, 0x00, 0x00, 0x0A,
0xA8, 0x00, 0x00, 0x00, 0x00, 0x00, 0x02, 0xAA, 0xA0, 0x00, 0x00, 0x00, 0x00, 0x00, 0xAA, 0xA0,
0x00, 0x00, 0x00, 0x00, 0x00, 0x2A, 0xA0, 0x00, 0x00, 0x00, 0x00, 0x00, 0x0A, 0xA8, 0x00, 0x00,
0x00, 0x00, 0x00, 0x02, 0xAA, 0x00, 0x00, 0x00, 0x00, 0x00, 0x00, 0xAA, 0xA0, 0x00, 0x00, 0x00,
0x00, 0x00, 0xAA, 0xAA, 0x80, 0x00, 0x00, 0x00, 0x02, 0xAA, 0xAA, 0xA8, 0x00, 0x00, 0x00, 0x02,
0xAA, 0xAA, 0xAA, 0x80, 0x00, 0x00, 0x02, 0xAA, 0xAA, 0xAA, 0xA0, 0x00, 0x00, 0x00, 0x2A, 0xAA,
0xAA, 0xAA, 0x00, 0x00, 0x00, 0x0A, 0xAA, 0xAA, 0xAA, 0xAA, 0x80, 0x00, 0x02, 0xAA, 0xAA, 0xAA,
0xAA, 0xA8, 0x00, 0x02, 0xAA, 0xAA, 0xAA, 0xAA, 0xAA, 0x00, 0x00, 0xAA, 0xAA, 0xAA, 0xAA, 0xAA,
0x80, 0x00, 0x2A, 0xAA, 0xAA, 0xAA, 0xAA, 0xA0, 0x00, 0x2A, 0xAA, 0xAA, 0xAA, 0xAA, 0xA0, 0x00,
0x0A, 0xAA, 0xAA, 0xAA, 0xAA, 0xA0, 0x00, 0x0A, 0xAA, 0xAA, 0xAA, 0xAA, 0xA0, 0x00, 0x02, 0xA2,
0xAA, 0xAA, 0xAA, 0xA8, 0x00, 0x00, 0xA8, 0xAA, 0xAA, 0xAA, 0xAA, 0x00, 0x00, 0xA8, 0x0A, 0xAA,
0xAA, 0xAA, 0x80, 0x00, 0xA2, 0x02, 0xAA, 0xAA, 0xAA, 0xA0, 0x00, 0x2A, 0x80, 0xAA, 0xAA, 0xAA,
0xA8, 0x00, 0x0A, 0x00, 0x2A, 0xAA, 0xAA, 0xAA, 0x00, 0x00
};
Drawn by a simple 2bit drawing function:
void drawBitmap2Bit(int16_t sx, int16_t sy, const uint8_t bitmap[], int16_t w, int16_t h)
{
    int16_t offset = 0;
    uint8_t b = bitmap[offset];
    uint8_t bw = 0;

    display.startWrite();
    for (int16_t y = sy; y < (sy+h); y++) {
        for (int16_t x = sx; x < (sx+w); x++) {
            if(b & 0x80) {
                if (b & 0x40) {
                    display.writePixel(x, y, GxEPD_BLACK);
                } else {
                    display.writePixel(x, y, GxEPD_WHITE);
                }
            }

            b <<= 2;
            bw += 2;
            if(bw == 8) {
                offset++;
                bw = 0;
                b = bitmap[offset];
            }
        }
    }
    display.endWrite();
}
Animating the Characters
Next the characters needed a bit of interesting animation to provide some life to the watch face. Simply moving the characters up and down on a sine wave with some random control seemed like an easy option with alternate frames. For this reason the characters were drawn then the chairs.
Now I needed a simple predictable random function. I would normally reach for a Messene Twister function here. Though I then noticed because of the wifi functionality the board had a decent random function esp_random(). So that was easily handled. The characters now had some animation.
Lots of Blank Space
I thought what to show on the cinema screen. I would love to have a little set of mini movies to play but for now the simplest I could think of was showing some random quotes from the show. Though this meant I needed to do a few things:
- Create a new tiny font
- Write a word wrap text drawing function
- Create a bunch of quotes
Using AI and IMDB made it easy to yank almost 100 quotes from the show. The tiny font was initially an easy 5x7 font I found. Though it was too tiny to read. So as a compromise I found this website, https://rop.nl/truetype2gfx/, to convert tty font to gfx font. I made a simple 9pt font which seemed like a reasonable trade off.
The wrapping function used the measure text bounds and a lazy split method to split into lines. The function calculates how many lines it needs based on total text width versus maximum width, then for each line it takes a portion of the remaining text (based on remaining length divided by remaining lines) and tries to find a nearby space to create a natural word break rather than cutting words in half. It looks forward by up to 5 characters for a space as a better breaking point which means sometimes words are split but not often.
This gives us the final version of the watch face.
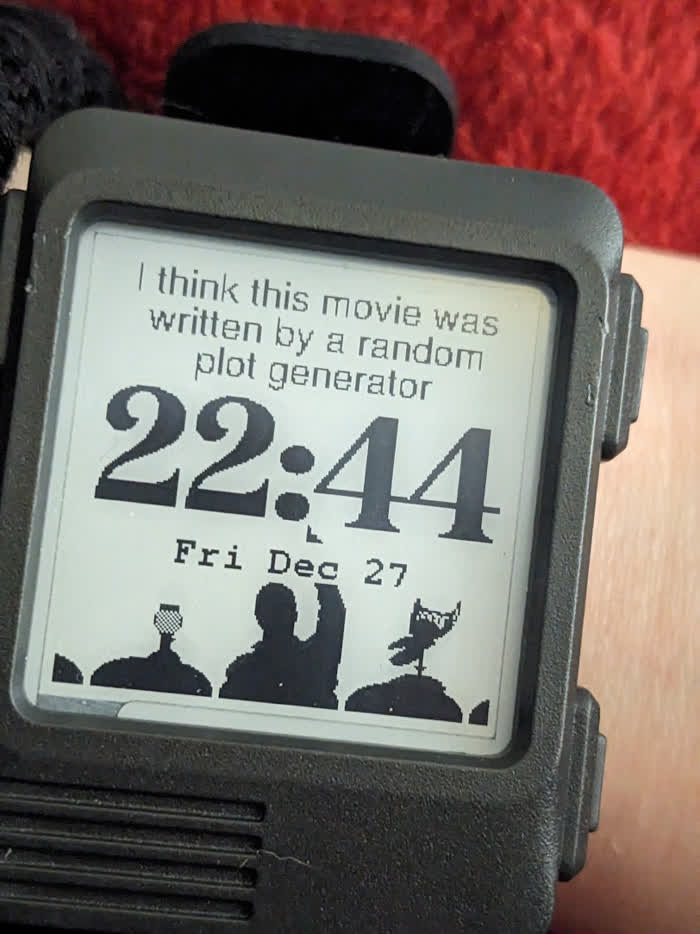
Thus concludes my yuletide coding adventure with this lovely piece of kit. As time allows I will do more hacking on the devices and will share any interesting bits I find. The ESP32 is a nifty platform to code for and the functionality of the watch with bluetooth and wifi is an interesting subset I want to do more with.
Hope this was fun and informative.
